Certified Kubernetes Administrator (CKA) with v1.18
![]()
- In the Kubernetes certifications (CKAD/CKA) it’s important to be fast.
- Before appearing to the exam please go and check out the Latest Kubernetes API version. Exam is based on the latest Kuberntes version only.
- Some of the commands may be deprecated for the latest version and if you try those commands in exam then it will be a big chaos.
- I am writing this blog on the latest version of Kubernetes v1.18 - Kindly ref to kubernetes.io before your exam.
- For CKA you have enough time to solve all 24 questions in 3hrs so no need to alias for even
kubectl=korkubectl get po=kgpo - For kubernetes cluster installation of master and worker nodes - Do not go for KTHW (Kubernetes The Hard Way). It is clearly mentioned that install clusters with kubeadm only. So be handy only with kubeadm and kubeadm flags and options.
- Before the exam please just ask the experienced one who appeared for the exam recently.
- I found that bash autocompletion for commands were missing for both root and non-root terminal. Refer This
- For copy and paste the blogs from docs you do not have a limit for copying and pasting that number of lines. Here to copy paste faster, use keyboard shortcuts copy -
control + insertfor paste -shift + insertkeep this handy. - If you are a heavy linux user please avoid
control + wthis will close your browser session. Only the exam tab and one more tab (kubernetes.io and subdomain) is allowed to open in the browser. - Before appearing for the exam you should have a basic understanding of Linux and it’s compulsory. i.e.
vi/vim,cat,sudo,sudo su -,ssh,nslookup,ping,telnet,scp,mkdir,touch,awk,grep,findor redirection of output into a file, maybe file permission, access denied. - This is an actual hands-on practical exam. So please do not ask for dumps or questions that appear in the exam.
- For exam instructions please go to cncf official website or you will get at the booking the exam slot.
- Now let’s start with actual exam preparation
Contents:
- Application Lifecycle Management — 8%
- Installation, Configuration & Validation — 12%
- Core Concepts — 19%
- Networking — 11%
- Scheduling — 5%
- Security — 12%
- Cluster Maintenance — 11%
- Logging / Monitoring — 5%
- Storage — 7%
- Troubleshooting — 10%
For creating any resource please use dry run at the end and save it in file so that it will be easy to deploy - pod, deployment, service, etc -o yaml --dry-run=client
In case if you want to change namespace kubectl config set-context $(kubectl config current-context) --namespace=default
Preparation
1. Deployment
- Refer Deployment doc for more details Ref - kubernetes deployment
- To create simple deployment
kubectl create deployment nginx-deploy --image=nginx - Custom deployment if you want to edit or modify. Open deployment.yaml make the changes and save it.
kubectl create deployment nginx-deploy --image=nginx -o yaml --dry-run=client > deployment.yaml - Once changes saved then,
kubectl apply -f deployment.yaml - To verify deployment,
kubectl get deployment
kubectl describe deployment nginx-deploy - To scale deployment = 2
kubectl scale deployment nginx-deploy --replicas=2 - To expose deployment on port = 80 as a ClusterIP or accessing service within the Cluster
kubectl expose deployment nginx-deploy --name=nginx-service --port=80 --target-port=80 --type=ClusterIP
kubectl get svc - Here is the sample deployment using dry run
kubectl create deployment nginx --image=nginx:1.12 -o yaml --dry-run=client``` apiVersion: apps/v1 kind: Deployment metadata: name: nginx-deploy spec: selector: matchLabels: app: nginx-deply replicas: 1 template: metadata: labels: app: nginx-deploy spec: containers:- name: nginx
image: nginx:1.12
ports:
- containerPort: 80
```
kubectl apply -f deployment.yaml
- containerPort: 80
```
- name: nginx
image: nginx:1.12
ports:
- Deployment rollout and undo rollout
a. Deploying nginx:1.12
kubectl create deployment nginx-deploy --image=nginx:1.12
b. Updating image to 1.13 i.e. rollout
Check the name of nginx container
kubectl describe deployment nginx-deploy
kubectl set image deployment/nginx-deploy nginx=nginx:1.13 --record=true
c. Check rollout history
kubectl rollout history deployment nginx-deploy
d. Undo rollout
kubectl rollout undo deployment nginx-deploy
##### Note: Do not use kubectl run nginx --image=nginx --restart=Always to create deployment as it’s been deprecated in v1.18
2. Pod
- Create pod Ref - kubernetes pod
kubectl run nginx-pod --image=nginx - Edit or modify before runing pod by dry-run
kubectl run nginx-pod --image=nginx -o yaml --dry-run=client > pod.yaml
``` apiVersion: v1 kind: Pod metadata: labels: run: nginx name: nginx spec: containers:- image: nginx name: nginx ```
- Expose pod - please check deployment expose
- Check exposed pod from another pod or accessing one pod from another pod
kubectl run tmp --image=busybox:1.28.0 --restart=Never --rm -it ping nginx-service
kubectl run tmp --image=busybox:1.28.0 --restart=Never --rm -it nslookup nginx-service
check with pod - check the pod ip consider here it is 10.0.0.1 and namespace = default
kubectl run tmp --image=busybox:1.28.0 --restart=Never --rm -it nslookup 10-0-0-1.default.pod - StaticPod Ref- kubernetes StaticPod
a. create pod by dry-run
kubectl run nginx-pod --image=nginx -o yaml --dry-run=client > staticpod.yaml
b. copy staticpod.yaml file byscpto worker node and keep in/etc/kubernetes/manifestor check staticPodPath path from config.yaml and place yaml file on the same
c. check pod is up or not
kubectl get pod - Multi-container pod with nginx and redis - copy spec from pod template
``` apiVersion: v1 kind: Pod metadata: labels: run: multicontainer name: multicontainer spec: containers:- image: nginx name: nginx
- image: redis name: redis ```
- Troubleshoot over pod or deployment
a. Check pod logs
kubectl logs nginx
b. Check pod failure
kubectl describe pod nginx
c. Edit pod
kubectl edit pod nginx
d. login into pod
kubectl exec -it nginx sh
3. initContainer
- Create a normal pod by dry-run and add initContainer spec in it. Here init container is downloading index.html before start of actual nginx container Ref - kubernetes initContainer
``` apiVersion: v1 kind: Pod metadata: name: init-demo spec: containers:- name: nginx
image: nginx
ports:
- containerPort: 80 volumeMounts:
- name: workdir
mountPath: /usr/share/nginx/html
These containers are run during pod initialization
initContainers:
- name: install
image: busybox
command:
- wget
- “-O”
- “/work-dir/index.html”
- http://kubernetes.io volumeMounts:
- name: workdir mountPath: “/work-dir” dnsPolicy: Default volumes:
- name: workdir
emptyDir: {}
```
4. DaemonSet
- name: nginx
image: nginx
ports:
- Create DaemonSet or Deploy DaemonSet so that every node contain at least have 1 pod running on it Ref - kubernetes DaemonSet
apiVersion: apps/v1
kind: DaemonSet
metadata:
name: fluentd-elasticsearch
labels:
  k8s-app: fluentd-logging
spec:
selector:
  matchLabels:
    name: fluentd-elasticsearch
template:
  metadata:
    labels:
      name: fluentd-elasticsearch
  spec:
    containers:
    - name: fluentd-elasticsearch
      image: quay.io/fluentd_elasticsearch/fluentd:v2.5.2
5. Secret
- Create secret name=mysecret from username:testuser, password:iluvtests Ref - kubernetes secret
kubectl create secret generic mysecret --from-literal=username=testuser --from-literal=password=iluvtests - secret as a environment variables SECRET_USERNAME
```
apiVersion: v1
kind: Pod
metadata:
name: secret-env-pod
spec:
containers:
- name: mycontainer
image: redis
env:
- name: SECRET_USERNAME valueFrom: secretKeyRef: name: mysecret key: username ```
- name: mycontainer
image: redis
env:
- secret as a volume mount path /etc/foo
```
apiVersion: v1
kind: Pod
metadata:
name: mypod
spec:
containers:
- name: mypod
image: redis
volumeMounts:
- name: foo mountPath: “/etc/foo” readOnly: true volumes:
- name: foo secret: secretName: mysecret ```
- name: mypod
image: redis
volumeMounts:
6. PersistentVolume & PersistentVolumeClaim
- Create pv Ref - kubernetes pv
``` apiVersion: v1 kind: PersistentVolume metadata: name: task-pv-volume labels: type: local spec: storageClassName: manual capacity: storage: 10Gi accessModes:- ReadWriteOnce
hostPath:
path: “/mnt/data”
```
kubectl get pv
- ReadWriteOnce
hostPath:
path: “/mnt/data”
```
- Create pvc - it should be in a bound state once pvc is created. Remember storageClassName should be same as pv and also check for accessModes
```
apiVersion: v1
kind: PersistentVolumeClaim
metadata:
name: task-pv-claim
spec:
storageClassName: manual
accessModes:
- ReadWriteOnce
resources:
requests:
storage: 3Gi
```
kubectl get pvc
- ReadWriteOnce
resources:
requests:
storage: 3Gi
```
- Use above pvc in pod
```
apiVersion: v1
kind: Pod
metadata:
name: task-pv-pod
spec:
volumes:
- name: task-pv-storage persistentVolumeClaim: claimName: task-pv-claim containers:
- name: task-pv-container
image: nginx
ports:
- containerPort: 80 name: “http-server” volumeMounts:
- mountPath: “/usr/share/nginx/html” name: task-pv-storage ```
- pod with emptyDir{} i.e. data should be deleted if pod delete and mount on /cache Ref - kubernetes emptyDir
``` apiVersion: v1 kind: Pod metadata: name: test-pd spec: containers:- image: k8s.gcr.io/test-webserver
name: test-container
volumeMounts:
- mountPath: /cache name: cache-volume volumes:
- name: cache-volume emptyDir: {} ```
- image: k8s.gcr.io/test-webserver
name: test-container
volumeMounts:
7. Network policy
- Here we need to understand the scenario and create a network policy or label pod. Ref - kubernetes network policy
kubectl get pods --show-labels
kubectl label pod redis role=db``` apiVersion: networking.k8s.io/v1 kind: NetworkPolicy metadata: name: test-network-policy namespace: default spec: podSelector: matchLabels: role: db policyTypes:- Ingress
- Egress ingress:
- from:
- podSelector: matchLabels: role: frontend ports:
- protocol: TCP port: 6379 ```
8. SecurityContext
- Set capabilities for Container Ref - kubernetes security context
``` apiVersion: v1 kind: Pod metadata: name: security-context-demo-4 spec: containers:- name: sec-ctx-4 image: gcr.io/google-samples/node-hello:1.0 securityContext: capabilities: add: [“SYS_TIME”] ```
- securityContext runAsUser: 1000 for pod
```
apiVersion: v1
kind: Pod
metadata:
name: security-context-demo
spec:
securityContext:
runAsUser: 1000
runAsGroup: 3000
fsGroup: 2000
volumes:
- name: sec-ctx-vol emptyDir: {} containers:
- name: sec-ctx-demo
image: busybox
command: [ “sh”, “-c”, “sleep 1h” ]
volumeMounts:
- name: sec-ctx-vol mountPath: /data/demo securityContext: allowPrivilegeEscalation: false ```
9. RBAC
- csr and approve csr from .csr file Ref - kubernetes csr
``` apiVersion: certificates.k8s.io/v1beta1 kind: CertificateSigningRequest metadata: name: my-svc spec: request: $(cat server.csr | base64 | tr -d ‘\n’) usages:- digital signature
- key encipherment
- server auth
```
kubectl certificate approve my-svc
- create role who can get, list, watch, update, delete the pod Ref - kubernetes rbac
kubectl create role devuser --verb=get,list,watch,update,delete --resource-name=pods - create rolebindings
kubectl create rolebinding newrole --clusterrole=view --serviceaccount=default:myapp --namespace=default
10. ETCD Backup
- Taking backup Ref - kubernetes etcd backup
$export ETCDCTL_API=3 ## check options with help command $etcdctl --help ## copy the cert path from below command $kubectl describe pod -n kube-system etcd-master ## please verify the path from above command $etcdctl snapshot save snapshotdb.db --endpoints=127.0.0.1:2379 --cacert="/etc/kubernetes/pki/etcd/ca.crt" --cert="/etc/kubernetes/pki/etcd/server.crt" --key="/etc/kubernetes/pki/etcd/server.key" - Verify snapshot
etcdctl --write-out=table snapshot status snapshotdb.db
11. Cluster Installation
- kubeadm installation on both node Master and Worker Node.
sshto master and worker node for installation. Ref - kubernetes kubeadm installation
sudo apt-get update && sudo apt-get install -y apt-transport-https curl curl -s https://packages.cloud.google.com/apt/doc/apt-key.gpg | sudo apt-key add - cat <<EOF | sudo tee /etc/apt/sources.list.d/kubernetes.list deb https://apt.kubernetes.io/ kubernetes-xenial main EOF sudo apt-get update sudo apt-get install -y kubelet kubeadm kubectl sudo apt-mark hold kubelet kubeadm kubectl systemctl daemon-reload systemctl restart kubelet - kubeadm init to initialize cluster check if any arguments has asked while initialize the cluster - Master node only Ref - kubernetes kubeadm initialize
kubeadm init <args> mkdir -p $HOME/.kube sudo cp -i /etc/kubernetes/admin.conf $HOME/.kube/config sudo chown $(id -u):$(id -g) $HOME/.kube/config kubectl apply -f "https://cloud.weave.works/k8s/net?k8s-version=$(kubectl version | base64 | tr -d '\n')" - Join Worker node - Copy this from init command and run this on Worker node Only
` kubeadm join: --token --discovery-token-ca-cert-hash sha256: ` - Confirm nodes it should be in Ready state
kubectl get nodes
12. Cluster troubleshoot
- Check master node and worker is running or not
- Check all components are running or not. like ETCD, kubelet, kube scheduler, etc
- Check all paths verifying all are on the correct path in config and actual. like cert path, config path, kubeconfig file
- Check logs of master components which are failing.
- If the component is running on system like kubelet then check in
/var/log/messagesor/var/log/syslogorjournalctl -u kubelet
13. jsonpath
- Examples Ref - kubernetes jsonpath
# Get the version label of all pods with label app=cassandra
kubectl get pods --selector=app=cassandra -o  jsonpath='{.items[*].metadata.labels.version}'
# Get ExternalIPs of all nodes
kubectl get nodes -o jsonpath='{.items[*].status.addresses[?(@.type=="ExternalIP")].address}'
# List Events sorted by timestamp
kubectl get events --sort-by=.metadata.creationTimestamp
# All images running in a cluster
kubectl get pods -A -o=custom-columns='DATA:spec.containers[*].image'
# sort by capacity
kubectl get pv --sort-by=.spec.capacity.storage
14. kubectl cheatsheet
Common Mistakes
- Make sure that you have switched to correct context/cluster or not. That is mentioned on top of every question.
- Wrong indentation in yaml file.
- Deployment in wrong namespace.
- Checking pod in wrong namespace.
- Adding labels to deployment and pod.
- Recheck or verify the deployment or pod by 1/1 or 2/2 in Ready state.
- If you are applying any yaml file then check if all mandatory fields are present or not. Eg DaemonSet or Network Policy.
- Check deployment for DaemonSet, whether it is running on all nodes or not.
- For initContainer the container is up or not with 1/1 after Init1:1
- For jsonpath output, check whether the output is in correct format or not as per question.
- While storing output checks you have access to the mentioned location and once stored verify with
catcommand. - Do not waste your time solving any question where you stuck for a long time.
- Instead of creating manual yaml files, use kubernetes.io and copy paste the block in the file editor.
- For troubleshooting/installation of clusters, check nodes are up and running.
- Most Important - Do not delete or recreate existing resources. You are only allowed to modify it. Do not try to export, delete and create those resources. Where you can create, delete, update your resources that have been asked in exam.
All the Best For your Exam!!
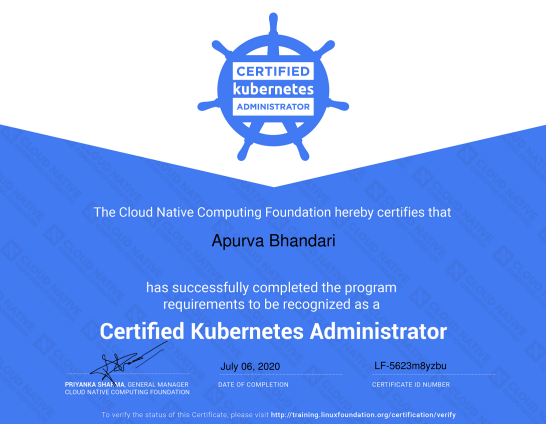
My CKA certificate
Creator
Do reach out to me for any query regarding the exam.
How to start ?
- Check Learning Resources References